

How To Build A Duck Pond With Filter
Tyrant Farms is reader-supported. When you lot purchase through links on our site, we may earn an affiliate commission. Acquire more than
Since this DIY lawn pond article is fairly long and detailed, we've included a table of contents. Yous can quickly click the table links below to jump to specific parts of the commodity that you're interested in. Of course, we'll try not to be upset with you if you're not interested in the whole article!
Terminal updated: Oct 7, 2019 with new pond filter pad recommendations.
What's Within
- Duck Fanatics In Search of DIY Backyard Swimming
- 3 Ways a Swimming Changed Our Ecosystem
- DIY Pond: I. Expectations (Time, Cost, Weather, Work)
- DIY Pond II. Slideshow: From Start to Finish
- DIY Swimming: III. How to Build Lawn Swimming & Biofilter
- DIY Pond: 4. Ongoing Pond Maintenance
- Pond Materials List
Radical Duck Fanatics In Search of DIY Backyard Pond…
In example this is your offset visit here, you should be forewarned that we're duck fanatics… Radical duck evangelists who recollect more people (every bit long as they're responsible people) should have backyard ducks.
Why? Equally we've written well-nigh elsewhere, for most people interested in raising egg-laying fowl, ducks often make a superior alternative to chickens.
One big stardom between chickens and ducks is that chickens take grit baths whereas ducks accept water baths (waterfowl come past their name honestly).
"You've made me a decent pond, human slave."
As such, if you're going to heighten happy, good for you ducks, you'll demand a h2o source for them. This can be a minor kiddie pool… or information technology can be something more substantial.
We started off with a kiddie pool, but nosotros got tired of having to dump it out every day afterwards our seven waterfowl quickly turned their water fowl, er foul, which so made the "duck surface area" of our yard into a dingy pit.
Ane 24-hour interval, The Tyrant added a new project to my "honey do listing": build a 1,000+ gallon in-basis backyard pond for our ducks. Oh, and information technology needed to have a natural filtration organization that used biology, rather than chemicals, to go on the water clean. Piece o' block. I'll have it done before tiffin, dear.
In all fairness, my wife has a biological science and clinical inquiry background, and then she'd already done the bulk of the inquiry for me. She really but needed me for the heavy lifting. (In that location's a reason her nickname is The Tyrant.)
3 ways our backyard pond changed things at Tyrant Farms
ane. More than diverse ecosystem
Every bit yous've probably observed, natural water features (ponds, creeks, springs, etc) are a magnet for a wide variety of lifeforms. Since edifice our lawn pond, we've been blown abroad by the increment in dragonflies, frogs, salamanders, and other beneficial critters that we didn't used to see very oft.
We've also noticed a decrease in mosquitos since ducks, frogs, salamanders, dragonfly larvae and other swimming critters LOVE feasting on mosquito larvae. (Read almost the other way we organically control mosquitos here.)
We accept an edible organic landscape with several hundred species of food-producing plants and edible fungi, so having fifty-fifty more beneficial critters around to assistance usa manage things and keep pest insect populations in cheque is virtually welcome. We now see why so many permaculturalists rave about the benefits of having a backyard pond and other water features.

Our girls swimming on a snowy nighttime.
two. Happier humans
Humans have a deeply ingrained psychological connection to the sound of running water. On a fundamental level, burbling water sounds equate to an available h2o source, something our ancestors would have found quite reassuring before they could simply turn on a tap to get water.
Any time the weather permits, The Tyrant and I finish our day relaxing side by side to our pond/waterfall with a potable as our ducks dabble and breast-stroke in their swimming.
A waterfall also aerates the water, providing oxygen and/or dissolved oxygen for beneficial lifeforms, including our pond'due south fish, crawfish, salamanders, and perhaps most importantly: aerobic bacteria. If you've e'er noticed a foul, sewage-like smell from a pond, a sewer, a swamp, etc. – that'due south actually caused by various species of anaerobic bacteria (bacteria that don't need oxygen to survive).
Anaerobic leaner are often pathogenic, causing disease and disease in larger critters that ingest them. In an oxygenated environs, anaerobic bacteria can non survive or proliferate. (Side note: this is too the same reason yous turn compost – turning compost introduces oxygen and encourages aerobic leaner while discouraging anaerobic bacteria).
Yay to waterfalls and pond bubblers!

Ducklings enjoying a swim under Tyrant Falls.
three. Happier, healthier ducks
Our ducks' rigorous daily schedule normally includes almost three+ hours swimming, playing, dabbling, and cleaning themselves in their backyard swimming. Because of their pond, our ducks are much cleaner, healthier, and happier than they'd otherwise be.
Since we have ducks, we were much more determined about figuring out a natural, cocky-cleaning DIY pond filter organisation that relied on biological science rather than chemicals to make clean itself (eastward.g. a biofilter).
Planning & edifice your backyard swimming & biofilter
I. Expectations
Building a self-cleaning backyard pond isn't a modest projection, merely nosotros'd admittedly do it once again because of all the benefits it's added to our life — and our ducks' lives. Here's what you should wait, assuming yous decide to build a 1,000+ gallon lawn swimming similar to ours:
Fourth dimension
Nigh 75 hours of labor (maybe you can be more efficient than us).
Money
Program to invest roughly $1,500-$ii,000 if you don't have ducks and $two,000-$two,250 if you do have ducks (nosotros recommend boosted cleaning and pumping infrastructure if you have ducks, as we'll go over shortly).
Outdoor Weather condition
Ideally, the outdoor temps will need to be above fifty°F (10°C) and sunny during the time that you're applying sealer effectually your waterfall or doing your plumbing joints. You lot can always pause the project until the right atmospheric condition conditions come along.
Forcefulness
If digging, lifting big rocks, and hauling heavy wheelbarrows sounds like a lot of piece of work, get some help or consider hiring extra labor.

The swimming, version 1.o, in early jump.
Two. Backyard Swimming Pictures: From Offset to Stop
If you lot're like u.s.a., seeing pictures of something in addition to instructions is Actually helpful.
These DIY backyard pond pictures are intended to correspond with the next DIY sections of this commodity, and some of these images are redundant with the images included in Office 3. If you read something that you're having problem visualizing, hop support here to the slideshow and y'all'll probably find an answer!
Click the images if you'd similar them enlarged!
-
![]()
- 1/43 – This is our DIY backyard duck pond today, but it's certainly not where we started. Click through this slideshow to see every step of the process.

-
![]()
- 2/43 – This patch of grass eventually became a duck swimming.

-
![]()
- three/43 – Another view of the area from above for reference.

-
![]()
- 4/43 – When we got ducks, the area got mulch, a duck firm (the Quacker Box"), and a minor puddle. This small puddle afterwards became our biofilter pool.

-
![]()
- 5/43 – Since ducks tin can exist rather messy creatures, we soon mulched their surface area with leaves and wood chips and then they wouldn't turn information technology into a mud pit. It looked rather drab in the winter.

-
![]()
- 6/43 – Nosotros did a ton of research on natural ponds with biofilter systems that use benign bacteria and aeration (waterfalls & bubblers) to clean the water. Then nosotros sketched out the dimensions of our pond.

-
![]()
- 7/43 – Dimensions from the side (not fatigued to scale).

-
![]()
- 8/43 – Nosotros outlined our pool with a string and dug out the first tier. The ducks had united states of america pause periodically and so they could forage for worms.

-
![]()
- nine/43 – You'll want to utilise to employ 2 types of shovels: a standard round 1 for earthworks downwardly and a flat i for scraping out the tier floors.

-
![]()
- 10/43 – Digging out each tier, layer by layer. You'll cease up with a substantial pile of clay by the time you're all washed!

-
![]()
- 11/43 – Nosotros had the misfortune of finding a cable line buried over a foot deep in our backyard. Thankfully, we didn't cut it and we were able to trench out and loosen it then we could drib it to the level of our pond lesser. At that place are public services that will come out and mark your lines for you lot if you're concerned almost striking water, sewer, or electric lines.

-
![]()
- 12/43 – Cleaning upwards each tier.

-
![]()
- xiii/43 – The level of each tier isn't as important every bit your peak lip. We used twine and a level to make certain our lip was level all the fashion around.

-
![]()
- 14/43 – The dorsum side lip of our pond was lower than the front end then we congenital upward the lip to level with concrete pavers and covered them with red clay (we had plenty of that from the excavation). The clay was put down over the precipitous pavers to assistance reduce abrasion on the swimming liner.

-
![]()
- fifteen/43 – Next comes the sand layer. About 1″ of sand is put down to reduce abrasion on your swimming liner.

-
![]()
- 16/43 – Your ducks volition exist very, very curious almost all of this and will require occasional reassurance.

-
![]()
- 17/43 – Sand layer done.

-
![]()
- 18/43 – Now it's time for the underlayment. This is another measure to help reduce abrasion and the likelihood of a liner puncture. It was windy out and the rocks are temporarily in place to concur the underlayment in place.

-
![]()
- nineteen/43 – Cover all the surfaces with underlayment. Again, the rocks are temporarily in place to concord the underlayment in place.

-
![]()
- 20/43 – Carefully curl out the liner without displacing the underlayment. Nosotros took off our shoes and pushed the liner into identify with our feet.

-
![]()
- 21/43 – Ready for rocks!

-
![]()
- 22/43 – The showtime layer of rocks. Build up the walls/sides with large rocks and put your pebbles on the flat surfaces.

-
![]()
- 23/43 – After dark, nosotros brought our biofilter pond inside to begin plumbing information technology. The next few photos evidence you how the pieces fit together. When we put information technology in place outside, we put a brick underneath the plumbing to elevator it off of the filter pond floor by a few inches.

-
![]()
- 24/43 – Biofilter plumbing progression. The mesh is really a ceiling light grate panel. It rests on top to ensure that your filter media doesn't clog up your outflows.

-
![]()
- 25/43 – Our pump pushes water up into the filter pond where the water then flows down into the base, exiting out of two sides (ensuring even distribution). From there, the water filters up through the sponge/bacteria media, which cleans it and filters out solids.

-
![]()
- 26/43 – In retrospect, nosotros should have plumbed in an on/off ball valve at the top. When we turn our primary pump off, the h2o sucks back out of the filter pond, rather than staying put. That's why we installed an on/off valve on our 2nd filter swimming as y'all tin meet in the featured image of the article.

-
![]()
- 27/43 – Morning! Fourth dimension to get back to pond edifice. This image shows you a closer await at building up the walls with big stones and the apartment surfaces with pebbles. Our stones were quite muddied. If we'd had more time, nosotros would take rinsed them, but there was a cold front/storm moving in.

-
![]()
- 28/43 – Finishing the 2nd tier as Bob the Cat gets loftier on fresh catnip in the background.

-
![]()
- 29/43 – Building upwardly the walls to the top. Salve your most attractive, wide flat rocks for the top lip. (The ducks can't resist exploring at each stage.)

-
![]()
- 30/43 – Observe what role doesn't have stones? The spot where the plumbing and waterfall will go. Relieve that for last.

-
![]()
- 31/43 – Time to plumb the waterfall! Put your pump on a stone to lift it off the floor of your bottom tier. Your pipes should be snug to the flooring and walls at each tier.

-
![]()
- 32/43 – A closer look at the plumbing. Nosotros cutting a chunk out of the side of our filter swimming and used "fish condom" silicone sealant to mucilage the liner to the inside of the filter pond.

-
![]()
- 33/43 – You'll want to leave plenty liner to drape downwards all the style into your master pond and go underneath your top waterfall rocks to prevent leaks.

-
![]()
- 34/43 – Waterfall rocks installed! Testing the system. Detect nosotros haven't trimmed or folded our pond liner nonetheless, but in case nosotros need to build upward the sides of the falls more than.

-
![]()
- 35/43 – The girls testing the swimming to make sure information technology meets standards.

-
![]()
- 36/43 – Starting time snow starting to fall on the new pond!

-
![]()
- 37/43 – Our pond plumbing has gone downward to five°F unprotected. As long equally h2o is flowing, there'south no risk of freezing and bursting pipes unless you're in sub-zero temps.

-
![]()
- 38/43 – Our pond was freezing over when it was really cold every bit you tin run into here. Nosotros got a pond de-icer which has fabricated a world of difference.

-
![]()
- 39/43 – Put plants in and effectually your pond to make information technology even more attractive! If you have ducks, forget about putting in duckweed, cattails, or lotuses – they'll swallow them long earlier they can get established.

-
![]()
- 40/43 – Spring view of Tyrant Falls. 🙂

-
![]()
- 41/43 – Yous can also put in pond lights to make your swimming and waterfall more than visible and attractive at nighttime.

-
![]()
- 42/43 – This shows a footing level view of our current pond. A second fifty gallon filter/bog system was added with a waterfall going into the outset biofilter swimming, and secondary waterfall helping aerate the far side of the pond.

-
![]()
- 43/43 – The duck village and Tyrant Falls (background) in the summertime with our cob oven in the foreground. Yes, we have a DIY guide on our site to evidence you how to make a cob oven too!

III. Step By Step: How to Build a Lawn Swimming With a DIY Biofilter
Since we accept ducks, we needed to plan for our pumps, plumbing, and swimming filter system to handle a lot of extra poo and feathers (aka "solids"). If yous don't plan to have waterfowl in your backyard pond and you don't call up lots of leaves and other plant debris volition fall into the pond throughout the year, you lot'll probably practice perfectly fine with a unmarried pump and filter swimming.
Whether you lot want to build a backyard duck pond, a meditation pond, a koi pond, a garden pond, or just a cute DIY pond to make your backyard extra flashy, let's get started!
*Note: There's a full materials list you can use at the bottom of this commodity, and then we won't exhaustively list out each item in the step-by-step pond building section.
i. Place the location of your lawn pond.
Carefully consider the location of your backyard pond. Are in that location likely to be big tree roots where you'll be earthworks? Underground pipes or wires? Is the surface area apartment or sloped? How volition that slope (or lack thereof) change your pond/waterfall designs?
If yous desire to employ our lawn pond as a model, see the dimensions in the above slideshow and our full general site plan below.

Our initial backyard swimming site plan revised to show the 2d bog filter, added in the of spring 2016. (click the image to view a larger version)
2. Dig your tiers & level the swimming foundation.

The different levels of our pond. (click the image to view a larger version)
Use the dimensions in the above images to mensurate out your pond. Yous tin utilize a string, chalk, or flour to mark the outline of the pond earlier you offset digging.
First tier – Once you've marked the outline of your pond, dig the whole thing out 7″ down (or more if y'all desire deeper pond shallows).
If you are planning to put plants in your lawn swimming, it'south a good idea to slope your shallows back just a bit towards the wall (vs. a level ledge) and then that your plants & your pebbles don't slowly slide into the centre of the pond. *see sketch above*
2d tier – Marker the outline of the second tier, then dig information technology downwards 12″>
Third tier/pump pigsty – Mark the outline of the third tier, then dig it downward another 12″.

All three tiers are roughed in! (#11 in the slideshow in a higher place)
When planning the depth of your lawn pond, keep in mind that in the months and years ahead, you will probable demand to occasionally become into the swimming to check on the pump and/or temporarily remove the pump in the event of a clog. That's why our swimming is thigh deep, not waist deep.
3. Sand, Material Underlayment, and Swimming Liner
Sand foundation
Put about i″ of sand on the apartment surfaces of your pond foundation (we got ane/2 scoop from our Landscapers Supply). This helps ensure that no sharp rocks or pointy objects punch a hole in your pond liner – y'all do NOT want to take to trace down a hole in your liner subsequently you've filled your swimming.

Adjacent comes the sand layer. Most 1″ of sand is put down to reduce abrasion on your swimming liner. (#17 in slideshow to a higher place)
Fabric Underlayment
Now you're set up for your protective underlayment, which prevents abrasion & punctures, further extending the life of your liner.
In that location are different things you tin can use here. We had some onetime mural fabric sitting around, so we used that. The mural fabric came in a long whorl, making it difficult to universally embrace the tiered pool foundation, as y'all can see in the slideshow. That'southward why we'd recommend using this this xv′ x 20′ geotextile underlayment instead.

Cover all the surfaces with underlayment. Again, the rocks are temporarily in identify to concord the underlayment in place – they didn't stay there. (#19 in slideshow above)
Pond Liner
Now comes the liner. We did a lot of enquiry here, and nosotros recommend using this Firestone 45 mil. EPDM, 15′ x 20′. It'southward a UV-resistant, highly flexible even so stable waterproofing membrane with a proven performance history in exposed applications – every bit tolerating extreme common cold and heat while maintaining its flexibility/non tearing.
The liner is likewise safe for exposure to wildlife and aquatic plants, which is important to u.s.a. given that nosotros're endemic by ducks. The liner fit snuggly into the contours of our pond and the black color allows any exposed surfaces to alloy in with our rocks.
Some people we read nearly opted for a PVC liner – don't practice information technology ! You lot'll likely end up with cracked liner and h2o leaks within a couple years, whereas the 45 mil. Firestone will last for xx+ years (it has a 20 year manufacturer warranty).

Advisedly ringlet out the liner without displacing the underlayment. Nosotros took off our shoes and pushed the liner into identify with our feet. (#20 in slideshow above)
4. Pebbles & Rocks
Now information technology's fourth dimension to start making your backyard pond beautiful!
Build upwards, tier by tier, from the bottom of your pond to the superlative. Permit us repeat that: do non get-go from the top and work down or you could end upwardly with stretched liner or rock issues.
Want to summate how many large rocks and pebbles/gravel y'all'll need? Here's a calculator.
Identify large landscaping rocks along the sides/walls of the 3rd tier (bottom) of your pond. Make full in the flat surfaces with 2″ of river pebbles and an occasional large flat rock to add stability and keep the pebbles from shifting besides much. Repeat, tier past tier.
*We put a large apartment rock in the center of the bottom tier/hole on our pond to provide a base for our pump and keep the pump off the very lesser of the pond (this helps keep the pump from getting clogged).
Begin slowly filling the swimming with water every bit y'all finish lowest tiers to help expedite settling. We concluded up scooping it dorsum out subsequently to plumb the pond.

22/43 – The starting time layer of rocks. Build up the walls/sides with big rocks and put your pebbles on the flat surfaces. (#22 in slideshow above)
On the outside lip of our backyard pond, we used concrete edgers/bricks covered with our native red clay to: a) provide a smooth, solid lip that was level all the way effectually, and b) enhance the level of the liner up ABOVE ground level (that way, full pond = basis level or slightly below).
The underlayment went over this lip, then the liner went on superlative. Big mural rocks were so placed on elevation to concord the liner downwards and hide it.

This image shows the edgers in place Before nosotros put the mud, sand, underlayment and liner over height. The cord helped us level this up. (#14 in slideshow above)
The liner extended out about vi-eight″ past the lip to allow for any settling or future pond expansions/alterations. (You can also hands seam together the liner with special pond liner adhesive.)
All around the outside of our pool nosotros put down wood chip mulch.

This image shows how far past our superlative rocks the liner extended. (#33 in slideshow above)
Double check to make sure every tier of rocks is solid and stable – no shifting, slipping, or sliding rocks. Everything nice and snug.

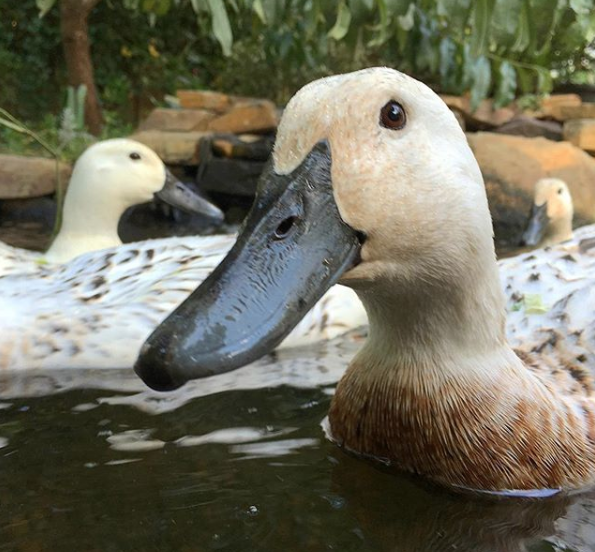
Nosotros take Welsh Harlequin ducks, a heritage breed that makes peachy pets and egg layers. They're bred from Mallards, which are "dabblers." Dabbling ducks tip underwater to forage, while keeping their butts and anxiety on the surface. Our ducks volition do short dives for fun, just they're not technically "diving" ducks, which can swim and hunt underwater for over a minute at a fourth dimension.
5. Skippy BioFilter, Plumbing, Pumps
Once your rocks and pebbles are all in identify, it's time to let your jeans sideslip down partially off your behind to show off your inner plumber. (Actually, don't practice that.)
Step 1: Set Filter Pond
Outset, get your filter swimming placed. To prevent the filter pond from sinking/settling, you'll desire to actually tamp downwards the foundation soil underneath information technology, then add near ii″ of gravel/sand mix, and so about one″ of sand over height of the gravel to prevent the gravel from roughing up and potentially puncturing the underside of the filter pond (alternately you could employ concrete pavers or pour a concrete pad below your freeze line).
Nosotros recommend using at least a fifty+ gallon filter pond. This is the 1 we wished we'd used on our first filter swimming (we used it afterwards on a 2d filter/bog swimming), but we used the quondam pool we already had instead. A 50 gallon filter pond should be more than than adequate to clean a ~1,000 gallon pond IF y'all don't accept ducks – we added a 2d fifty gallon filter pond a twelvemonth after since nosotros have seven ducks.
The exact ratio of filter pond to master pond is hard to determine. At that place are probably besides many potential factors to come up with a precise ratio that works for every scenario. For instance, if you have ducks, you're going to want to have a much college filter-to-pond ratio than someone who just has a couple of fish in their pond.
One fact remains: you tin can't have too much filter pond, only yous can certainly have too footling – so err on the side of too much biofilter/filter pond, particularly if you take waterfowl.
Step ii. Plumb the Pond
Position your pump on the stone in the heart of your pump pigsty. We highly recommend the Laguna 2900 Max-Catamenia pump – especially if y'all have ducks. Y'all want a pump that can handle solids and one that has enough power to turn your swimming water over two-four times per hr (calculations here).
The Laguna is also extremely free energy efficient. One time your pump is positioned, measure out and sketch out the lengths of PVC pipe and joints you lot're going to need to run pipe from your pump into the base of your filter pond. (Over again, the total list of plumbing supplies nosotros used is at the bottom of this article – but the verbal joints and lengths of pipe needed may vary depending on where you locate your filter swimming.)
Practice NOT seal any plumbing joints until you're confident everything is sized and fitted correctly. One time you lot've linked it all together and everything fits, seal your plumbing joints one by one, locking everything into identify.
Footstep 3. Add together Swimming Biofilter Pads
Place protective framing over the arrival in the lesser of your filter pond to make sure the pipes don't get chock-full with filter media when y'all unplug your pump (due to gravity, the pump sucks back out when turned off since the filter pond is college – unless yous plumb in a cut off valve at the top).
Updated Oct 2019 with new pond filter media recommendations!
In the original version of this article, we recommended hogs hair filters which work nifty. Notwithstanding, they break down over time, lose their filtering ability, and eventually require replacement.
In April 2019, we installed a different filter media that nosotros read really good things about: a combo of Matala Filter Media Pads – (Light-green) and Matala Filter Media Pads – (Grey). The different colors correspond with dissimilar filter density – grey = more dense, green = less dense.

Grey and dark-green Matala filter pad pieces. These were the left over scrap pieces after we cut out the primary filter piece in the image below.
We cut both the greenish and grey filter pads exactly to the size of our filter pond and stacked them on top of each other.
And so we put the remaining scrap pieces on height of the fitted ones.

We made a mold of our swimming bog filter with a piece of cardboard, then used the cardboard mold to cut out a piece of filter textile.
The green filter went in first to filter out the larger material. The grey filter went on top to filter out finer material.
Now, half-dozen months later, we're happy to report that the Matala filter pads accept made a huge difference in water quality in our pond. AND they're still in like-new status. (Covered with adept swimming leaner and muck but not breaking down similar hogs hair does.)
Despite 6 ducks swimming and pooping in our pond all twenty-four hours long, nosotros oasis't had to do a thing to our swimming since putting the new filter pads in (other than adding benign pond bacteria when we first put the new pads in).
When y'all're done putting your filter pads in to your bog filter, fill up the bog with water, *then squirt in this beneficial pond bacteria (follow quantity instructions on characterization based on size of your pond). This is the primary bacteria that'south going to clean the h2o in your backyard pond, and its home is going to largely be in your filter pads.
(*Important note: Merely put the pond bacteria into your new pond if you're going to be able to turn it on and have water flowing within a half day or so. Pond leaner needs h2o and nutrients to survive.)
This setup is chosen a skippy biofilter – you can geek out on the details hither if you'd like.
6. Build Your Waterfall
It might seem counterintuitive, but nosotros built our waterfall final. We wanted to have all of our plumbing and the filter pond in place BEFORE we put in the rocks that hide and support it.
In that location'due south no single formula for building a waterfall, and yours will exist unique because your rocks are unique. Some people concrete their foundations in, which is perfectly fine – but that doesn't allow y'all to easily change things/iterate afterward, which is why we went a different road.
Nosotros simply built upwards a foundation with gravel, sand, and stone, then put pond liner nether our final peak-level rocks going downwards the waterfall in social club to prevent water from escaping out of the system via the waterfall.
Since we'd never built a waterfall before, we looked at hundreds of photos of waterfalls online for inspiration. We'd recommend y'all do the same.
You'll as well demand to cut an opening in the siding of your filter pond, and use a scrap of pond liner and "fish-safe" silicone sealant to attach the liner to the inside of your filter pond. The liner volition need to extend out of the filter pond and onto your first waterfall rock to preclude h2o from leaking out backside your waterfall.
7. Testing, Testing, 1, two, 3
Show fourth dimension!
Fill your backyard swimming with h2o. Ideally you can use a dechlorinator to filter the chlorine out of the water you fill your pond with since chlorine tin kill beneficial leaner.
It's a good thought to take a close expect at your rock pond walls every bit the water fills around them to make certain they're non settling or moving too much, thus requiring you to reposition them.
One time your pond is full, plug your pump cord into a yard outlet (we've been using this Yard Master 6-Outlet power stake since day 1 and it however works). It's a magical thing to watch your backyard pond come up to life for the outset time!
If your water is dirty and turbid for the outset vii-fourteen days after y'all fill it, don't despair! That's normal. Information technology will take a chip of time for your filters to kicking into full gear and your swimming to clear upward.
Also, as your swimming is filling AND for the next 24-48 hours after information technology's full, keep a shut middle out for whatever signs of leaks. Is the ground wet where it shouldn't be? Is the pond level dropping? If so, there's a good chance you lot have a leak, and 9/10 times that leak is happening somewhere in your waterfall and can exist easily fixed past rearranging rocks or pond liner.
Depending on the time of year when you build your lawn pond, y'all'll probably want to add a second type of swimming-cleaning leaner to your water once the pond is full – either a warm h2o of cold water bacteria (encounter materials listing below for links).
Congratulations, you're now the proud new owner of a gorgeous backyard pond that you lot built yourself!

Happy ducks splashing and frolicking.
4. Ongoing Maintenance & Alterations To Your Lawn Pond
Ongoing maintenance on your lawn pond volition be minimal if you lot don't accept ducks. Ha! The fewer ducks y'all have, the less maintenance your pond will crave.
Given that we have ducks, nosotros decided that our single biofilter pond needed a friend, then we added a second l gallon filter bog with a waterfall that cascades into the back of the first filter pond. The full general rule is y'all want your bog/filter portion of your system to exist at to the lowest degree 20% of your pond; ex: 100 sq ft pond surface would demand 10-xx sq ft bog/filter system.
We also ended upwards adding a second waterfall off of our original filter swimming to add additional waterflow/aeration to the most side of our pond. You can encounter that project pictured below:

Due to seven ducks using our backyard pond for several hours per mean solar day plus a big oak tree dropping debris into the swimming regularly, we decided to add a second pump and filter, plus an boosted/secondary waterfall to increase aeration. Svetlana the Duck makes a neat foreman.
Additionally, to get fifty-fifty more than oxygen into our pond to keep Sid Fishest and his fish family (our four pond fish) happy, we got two of these small-scale aerators. More oxygen into your pond = healthier pond water. We do clean our filter media at least ane-ii times per twelvemonth as-needed, only without ducks yous should rarely (some people say never) accept to clean your filter media. That's one of the neat things almost the Skippy biofilter organisation.
Using the test strips in our materials list beneath, we examination our swimming h2o periodically throughout the year. The h2o has nonetheless to measure annihilation less than platonic.
Pond Maintenance Schedule
Here's what a normal ongoing pond maintenance schedule might look similar:
SPRING pond maintenance
- Check swimming water quality with this Pond Water Quality Exam Kit (here are the ones we use). If loftier nitrate levels detected, add seasonally-appropriate beneficial bacteria, then test h2o again a week later on.
- IF waterfall has slowed due to debris clogging it, unplug the pump. The h2o reversal will usually dislodge any is in the pump impeller; if non, y'all'll need to hop in, disconnect the pump, bring it to the side of the swimming, pop off the top and remove the clog manually.
Summertime swimming maintenance
- Same as spring.
FALL pond maintenance
- Same as bound, plus remove fall leaves by hand or with a net so they don't clog your pump.
WINTER swimming maintenance
- Same as bound, but we recommend getting a pond de-icer if you alive in a cold area. We live in Greenville, SC (Ag Zone 7B), which is not exactly known for frigid temps. Nonetheless, our pond will notwithstanding freeze over on really cold winter nights. After breaking apart and removing the water ice with our numb hands enough times, we finally decided to become this floating de-icer. It's kept our pond completely ice-free down into single digit temps, which makes usa and our ducks very happy.
Complete Materials List For Backyard Pond
Stones, Pebbles, Gravel, Sand
Easily constitute at local landscape supply companies.
- two-4,000 lbs rock (one-2 pallets)
- ane/2 scoop sand
- i/2 scoop river pebbles
- 1/2 scoop gravel
The Skippy Biofilter
Materials List:
- l gallon tub
- 1 – length of i 1/two inch PVC pipe.
- 1 – PVC tee.
- 3 – PVC elbows.
- ane – 1 ane/two inch to 1 1/4 inch threaded nipple reducer.
- 1 – plastic egg crate style overhead 2×4 lite grate (or something like). You tin find these in the ceiling tile section of Home Depot or Lowes or other hardware store. It'due south a ceiling light grate console. *You don't have to get this IF you use a really stiff filter media similar Matala filter pads.
- 4 – 1/four inch x 1 i/2 inch bolt, nut and washer combinations.
- Filter media/pads: Matala Filter Media Pads – (Green) and Matala Filter Media Pads – (Gray).
- Leaner inoculant for filter media
Pumps & Aerators:
- Laguna 2900 Max-Flow (for primary pump)
- Pump, Laguna 960 Max-Flow (*optional if you lot want to add together a second filter pond because of your ducks)
- Laguna Aerator (x 2)
- Hydrofarm Large Aerator Stones (x2)
Pond Making Materials:
- Underlayment (15′ ten 20′)
- Liner – Firestone 45 mil. EPDM ( 15′ x 20′)
- "Fish-safe" silicone sealant
- Insulating foam sealant for ponds (optional but great for sealing waterfalls or liner leaks)
Miscellaneous:
- G Master 13547 half-dozen-Outlet Power Stake with Light Sensor and 6-Pes Cord
- Pond De-Icer>
- Pond water quality test strips
- Warm weather swimming bacteria
- Cool/cold atmospheric condition pond bacteria
- piping/plumbing glue (to connect & seal the joints)
- sump pump (really comes in handy if y'all need to bleed part of your pond for cleaning or to reposition rocks, or to water garden beds)

Questions?
Got questions well-nigh building your own backyard pond? Ask away in the comments section below!
Or read our two follow-upward articles:
- Answers to oftentimes asked pond questions people have emailed u.s.
- How to make clean a Laguna Max-Flo pond pump (with instructional video)


Like what you're seeing here? Please be sure to subscribe to Tyrant Farms so we can allow you know about new articles you'll dear.

How To Build A Duck Pond With Filter,
Source: https://www.tyrantfarms.com/how-to-build-a-backyard-pond-with-diy-biofilter/
Posted by: vallierekeisheiled.blogspot.com
0 Response to "How To Build A Duck Pond With Filter"
Post a Comment